How to add a new asset
Last updated: July 7, 2026
Creating an asset is the first step to running threat emulations on a real business asset. A well-configured asset leads to more accurate results, broader testing coverage, and better risk prioritization.
To create an asset, you need the Owner or Operator role.
Before getting started, keep in mind that the quality of testing depends directly on the information and access you configure.
💡 The more context, documentation, and access the asset has, the better the results of the emulations.
Step by step
Click + Add New Asset from the Assets section. The process has 3 stages:
Step 1 — General
This stage defines the identity and context of the asset.
Basic information
Domain / URL
Address of the asset (e.g. https://app.mycompany.com)
Asset name
A clear name to identify it (e.g. Backoffice, Payments API)
Test environment
The environment where it's deployed: Development, Staging, or Production
Asset relevance
The asset's criticality level for the business. Helps prioritize testing and focus emulations based on potential impact.
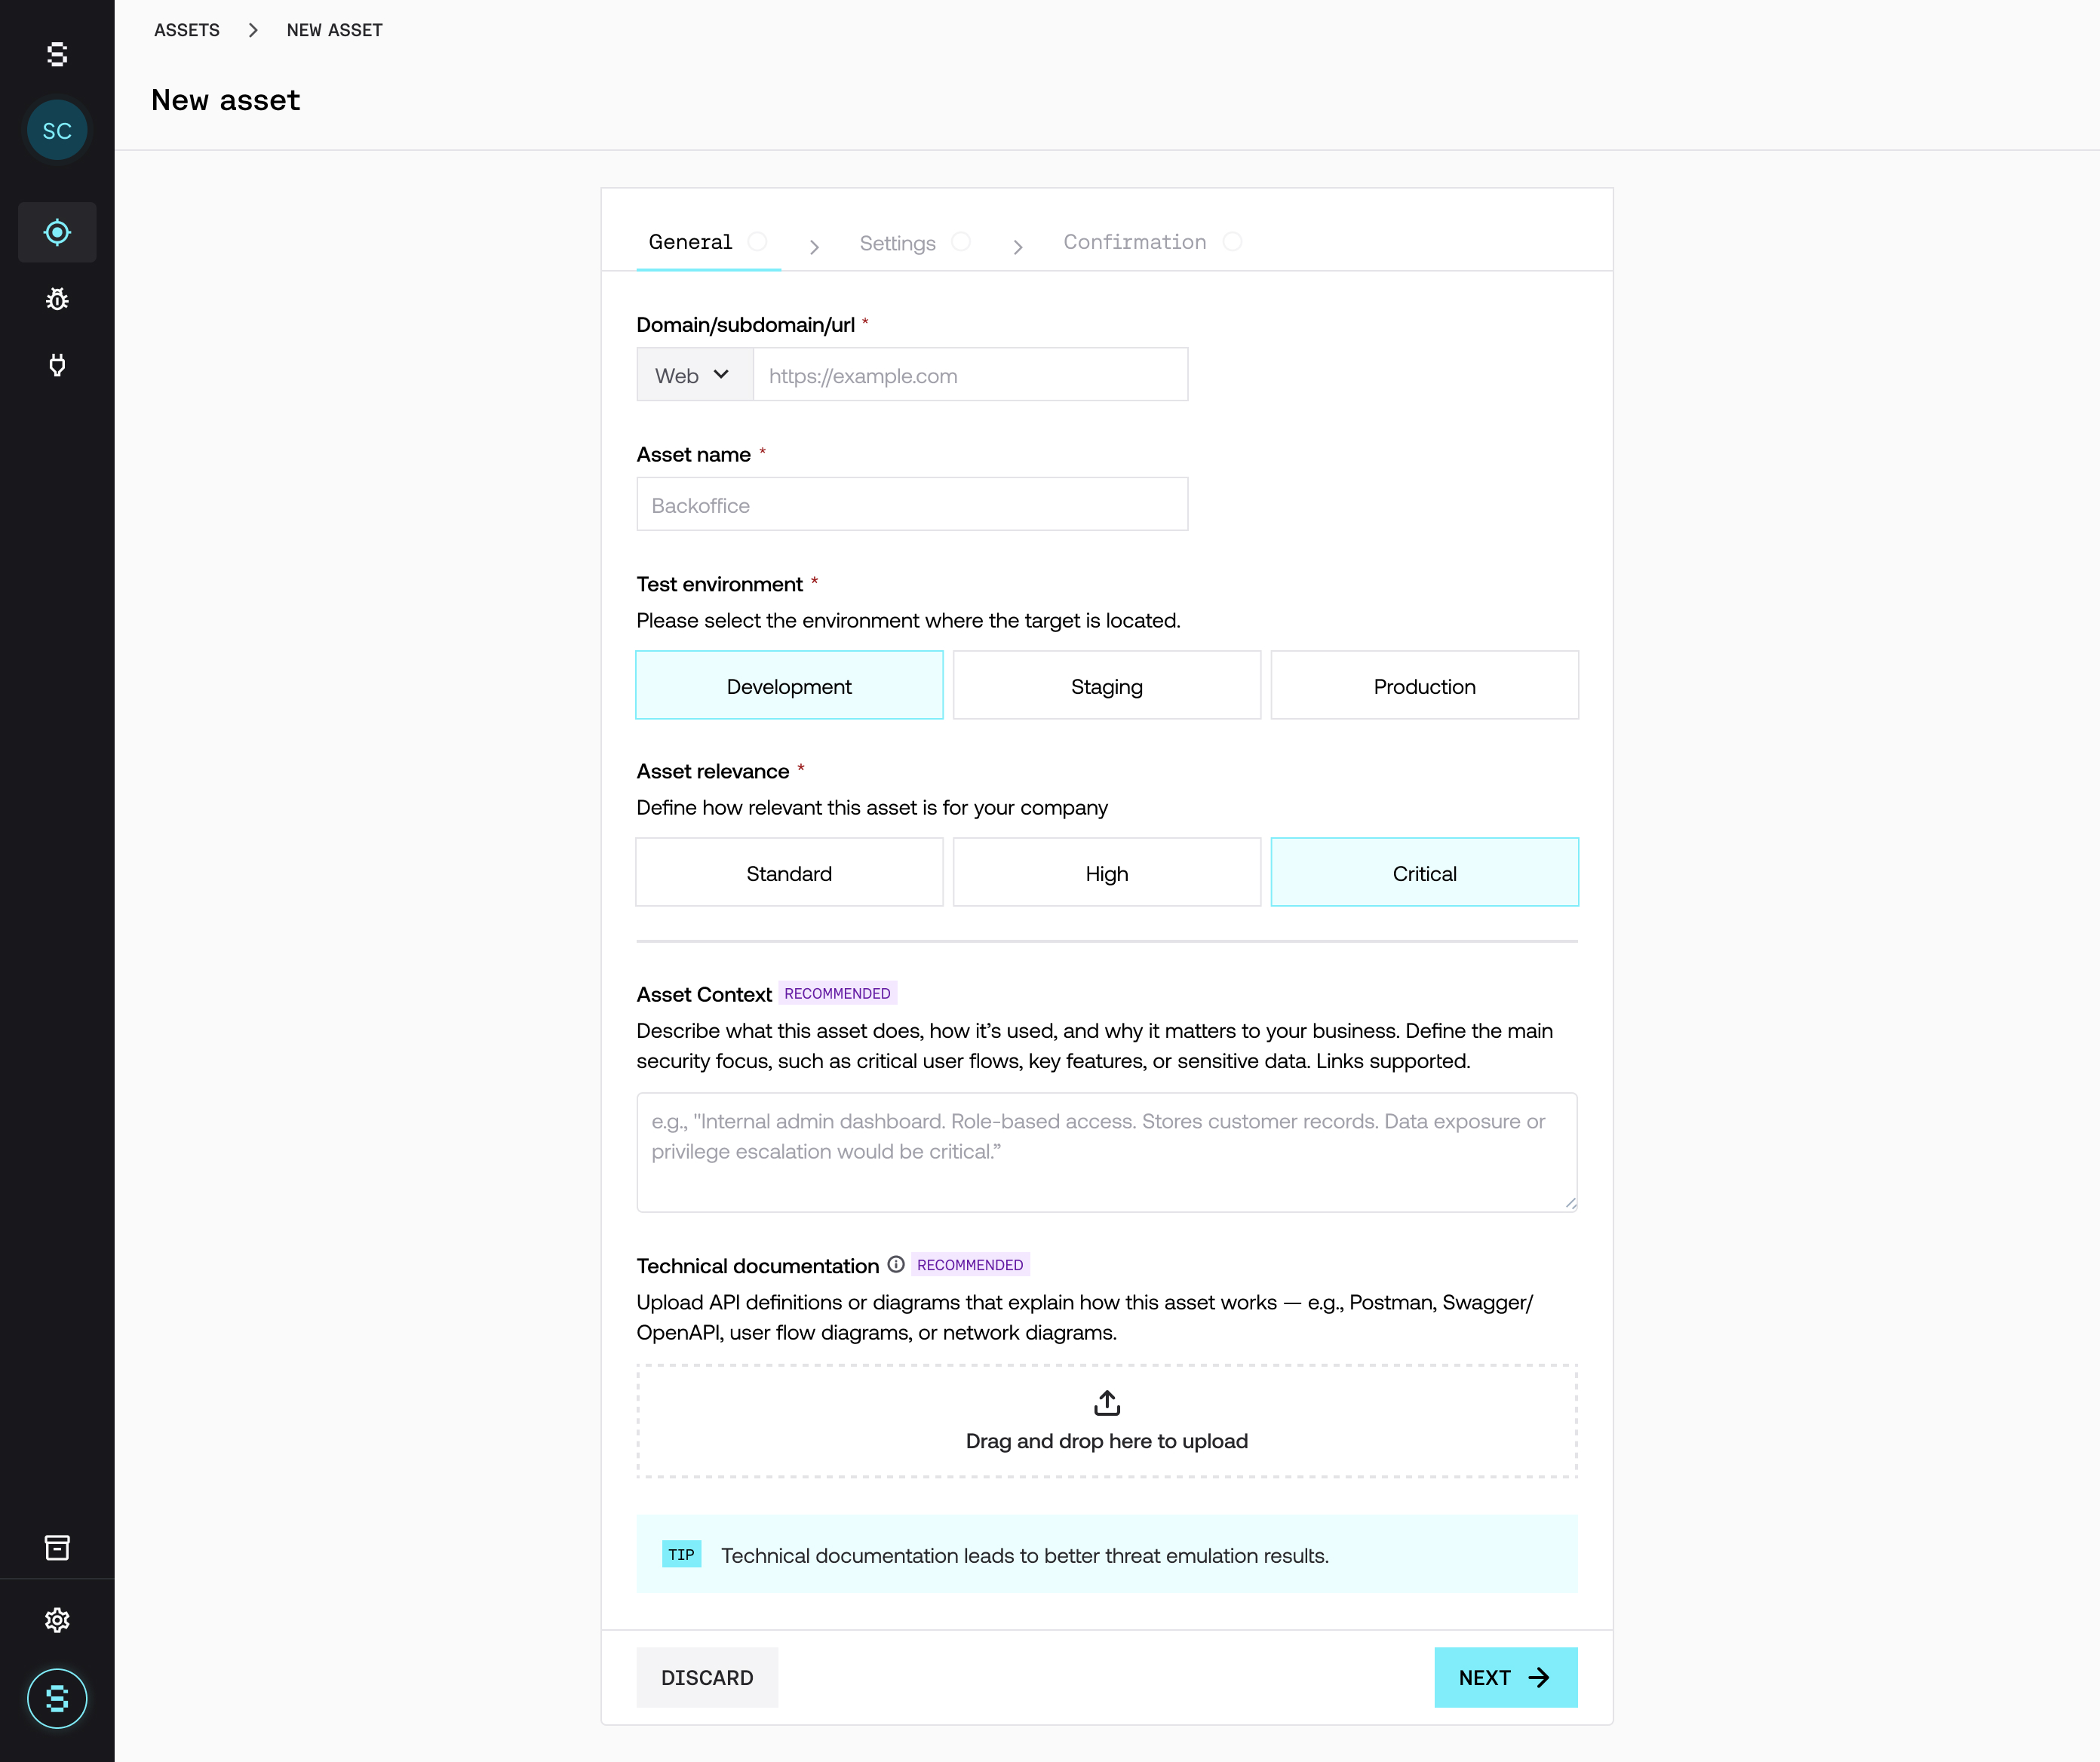
Asset context (recommended)
Describing how the system works significantly raises the quality of testing:
What the asset does
Main flows
Sensitive data
Relevant business logic
Tech stack and architecture (if applicable)
💡 Context helps simulate more realistic attack scenarios.
What to avoid
Including prompts like "act as a pentester…"
Adding full lists of endpoints (these should go in attached files)
Providing generic context that doesn't add value
👉 Keeping context clear and focused raises the quality of testing.
Technical documentation (recommended)
You can attach files that help understand the system:
Swagger / OpenAPI
Postman collections
Architecture or flow diagrams
PDFs with functional documentation
👉 It's highly recommended to include:
A full list of endpoints (via OpenAPI or Postman)
Key business flows (e.g. login, payments, onboarding)
A description of the system's architecture (microservices, APIs, integrations, etc.)
👉 This lets you:
Identify more complex attack paths
Significantly improve testing coverage
Reduce noise and false positives
Detect vulnerabilities that aren't visible from the surface
Without this information, testing coverage is limited and results may be incomplete.
Step 2 — Settings
This stage configures how the agent will interact with the asset.
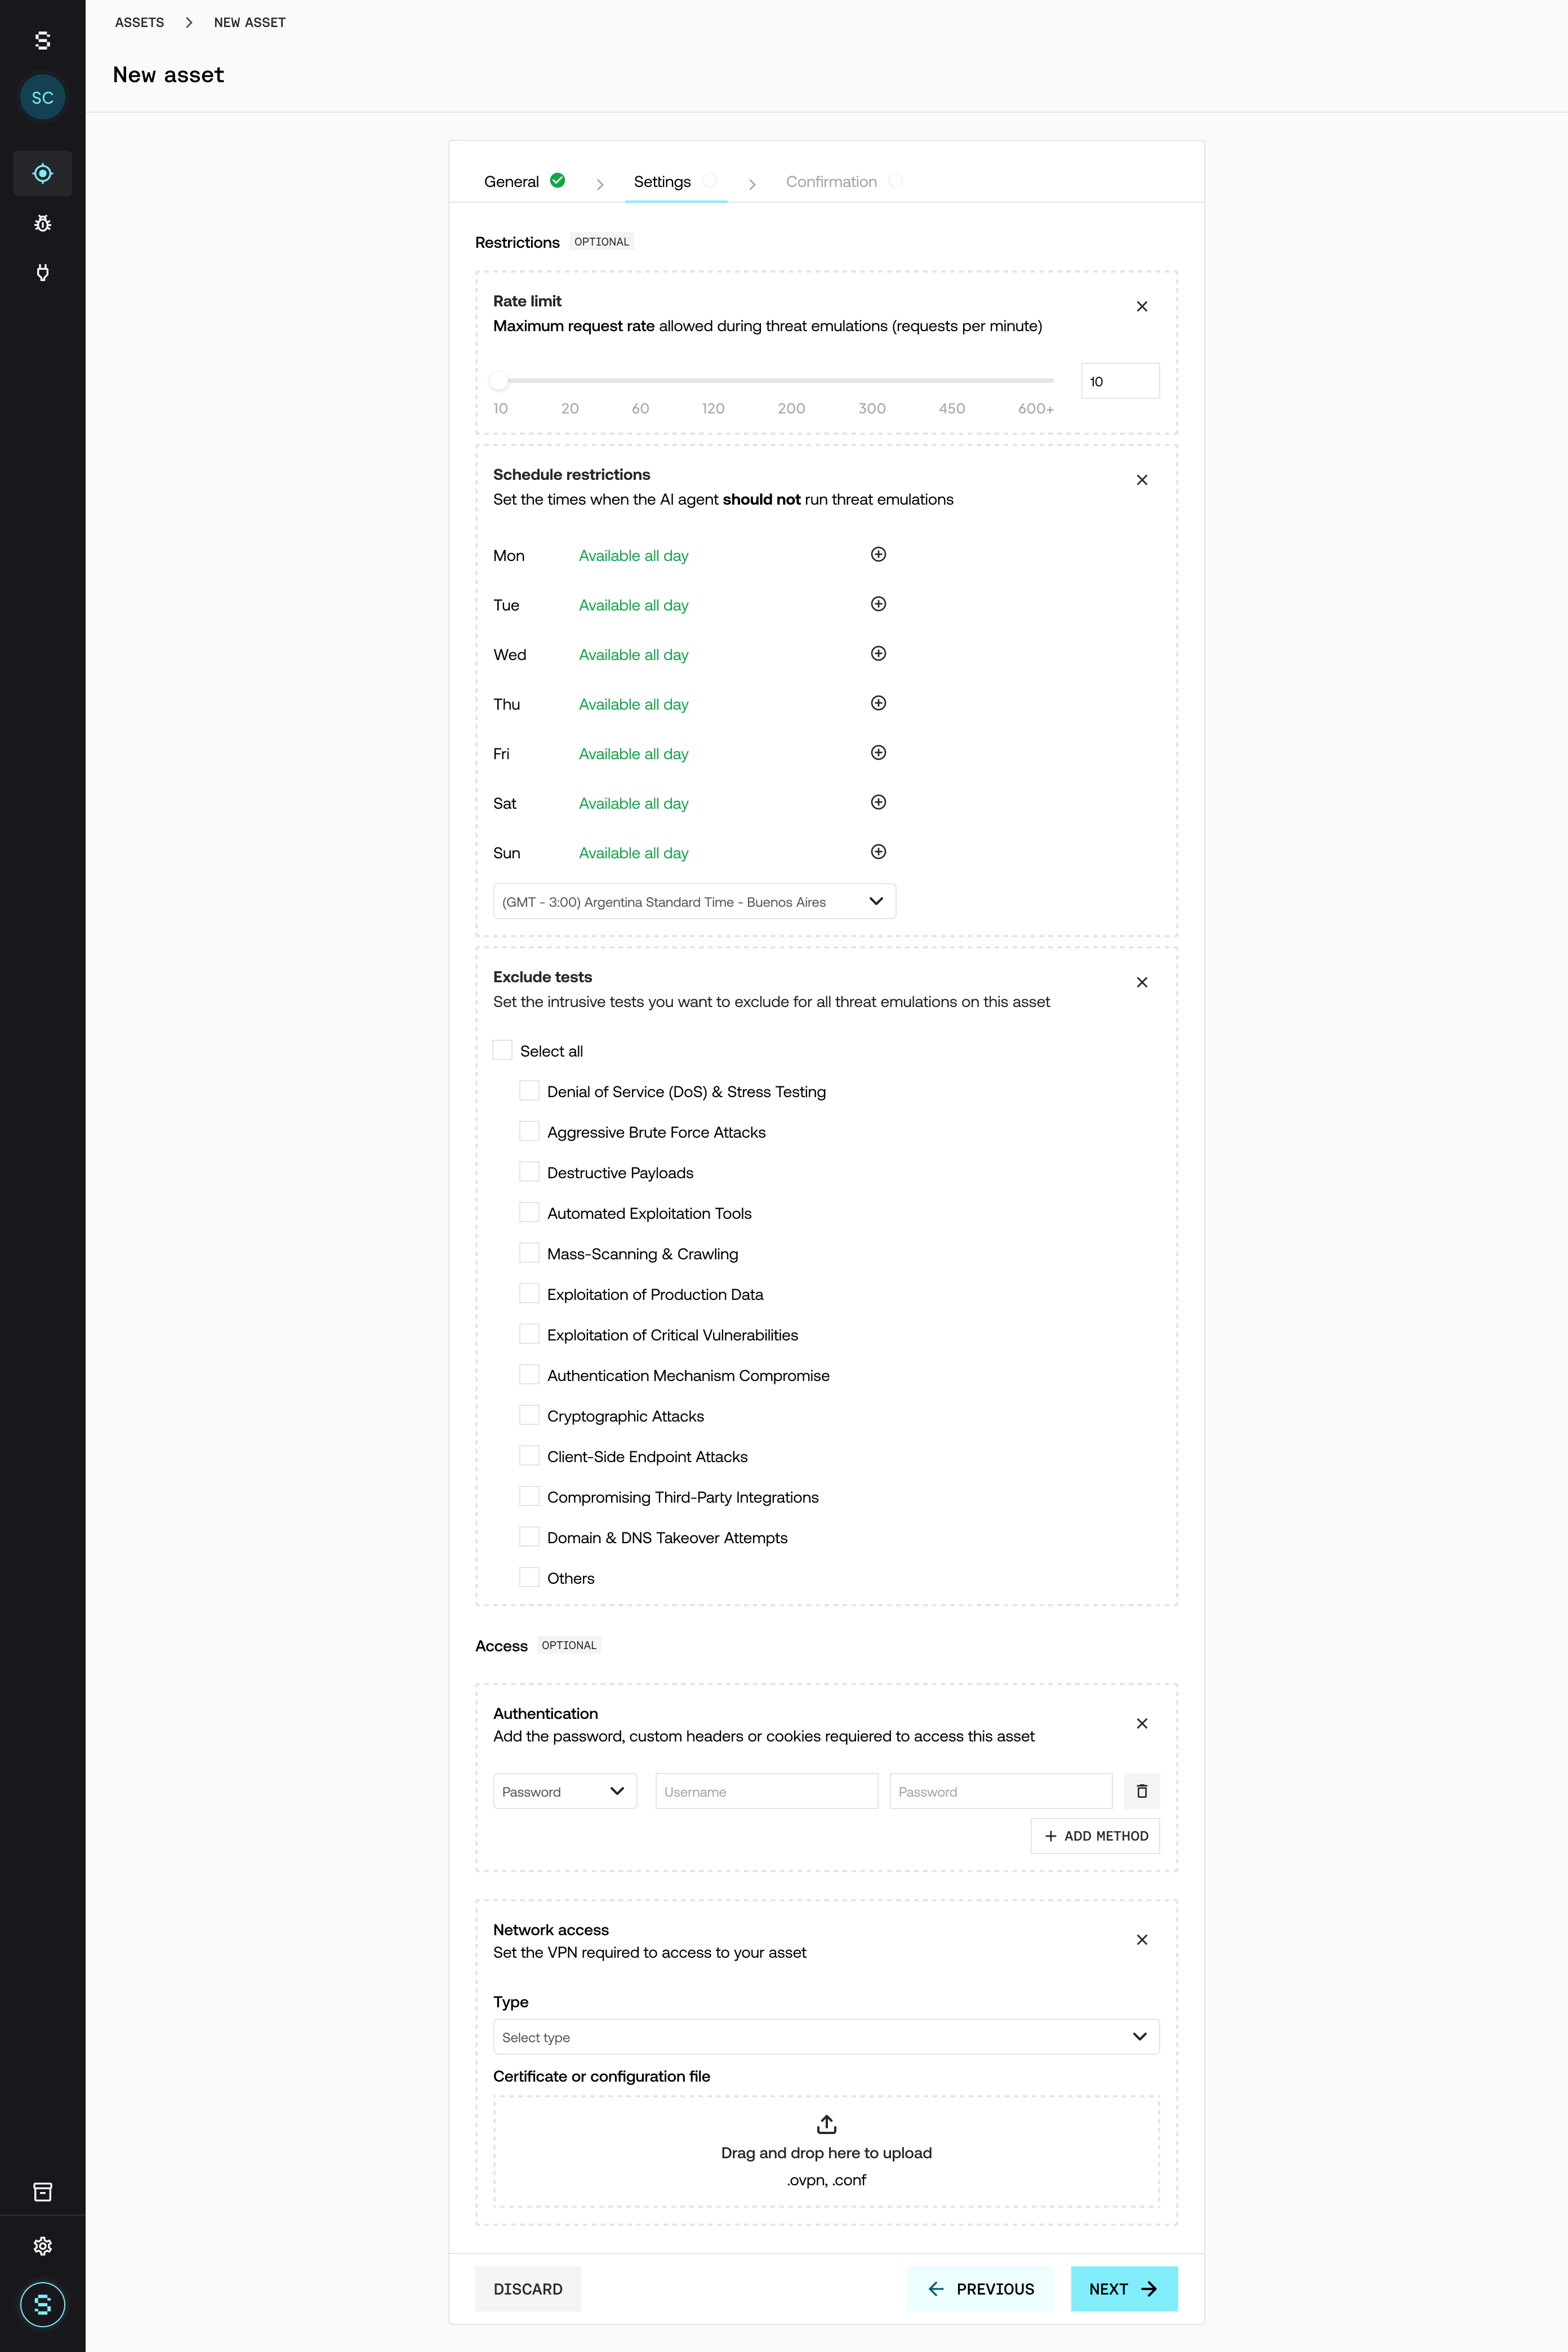
Authentication (recommended)
Lets you test protected areas of the system.
Supported types:
Username and password
Cookies
Custom headers
💡 Without authentication, testing is limited to the public surface.
Recommendations
Use test credentials, not real users
For APIs, prefer authentication via headers (Authorization)
Load multiple credentials if there are different roles to evaluate
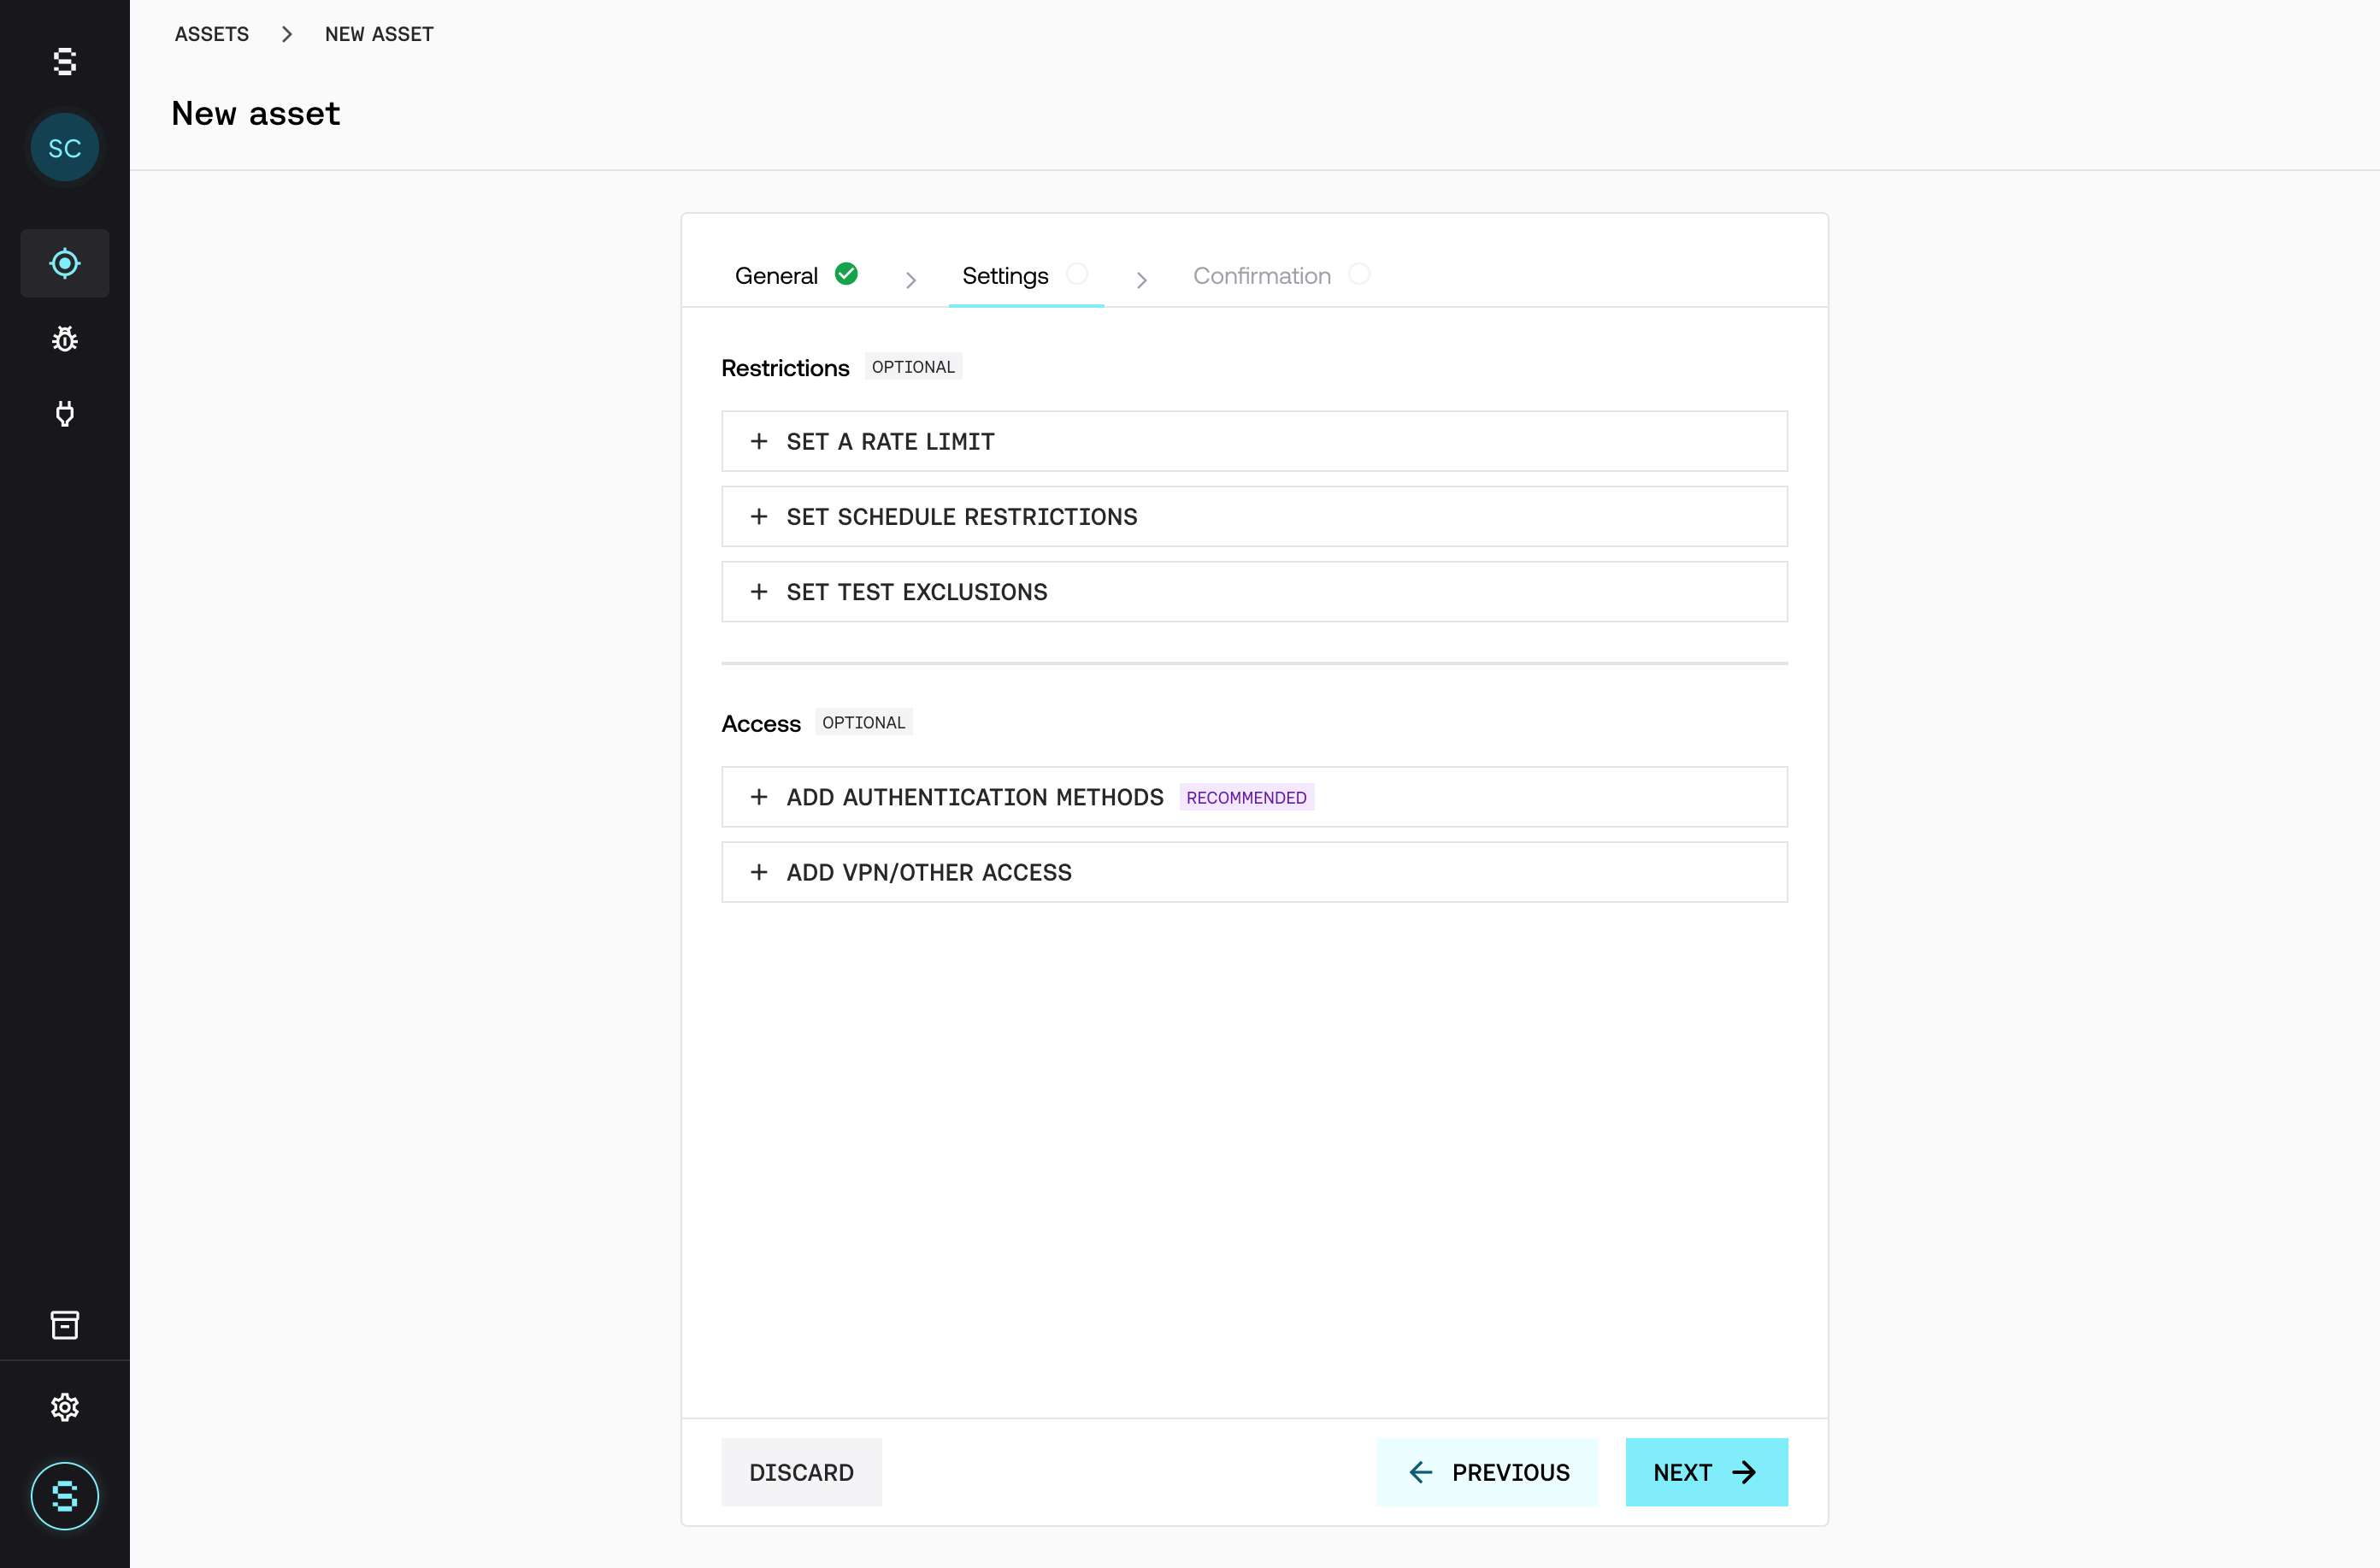
Access to private environments
If the asset isn't public, you can set up access via VPN. Strike supports OpenVPN and WireGuard protocols by default, which lets you evaluate internal or restricted systems in a controlled way.
Testing restrictions
Let you adapt emulations to the environment:
Rate limit: number of requests per minute
Schedule restrictions: time windows when tests shouldn't run
Test exclusions: testing categories to exclude
Examples:
DoS / stress testing
Aggressive brute force
Destructive tests
👉 Especially useful for production environments.
Step 3 — Confirmation
Before the asset is created, you'll see a full summary of the setup:
General information
Context and documentation
Access configured
Restrictions
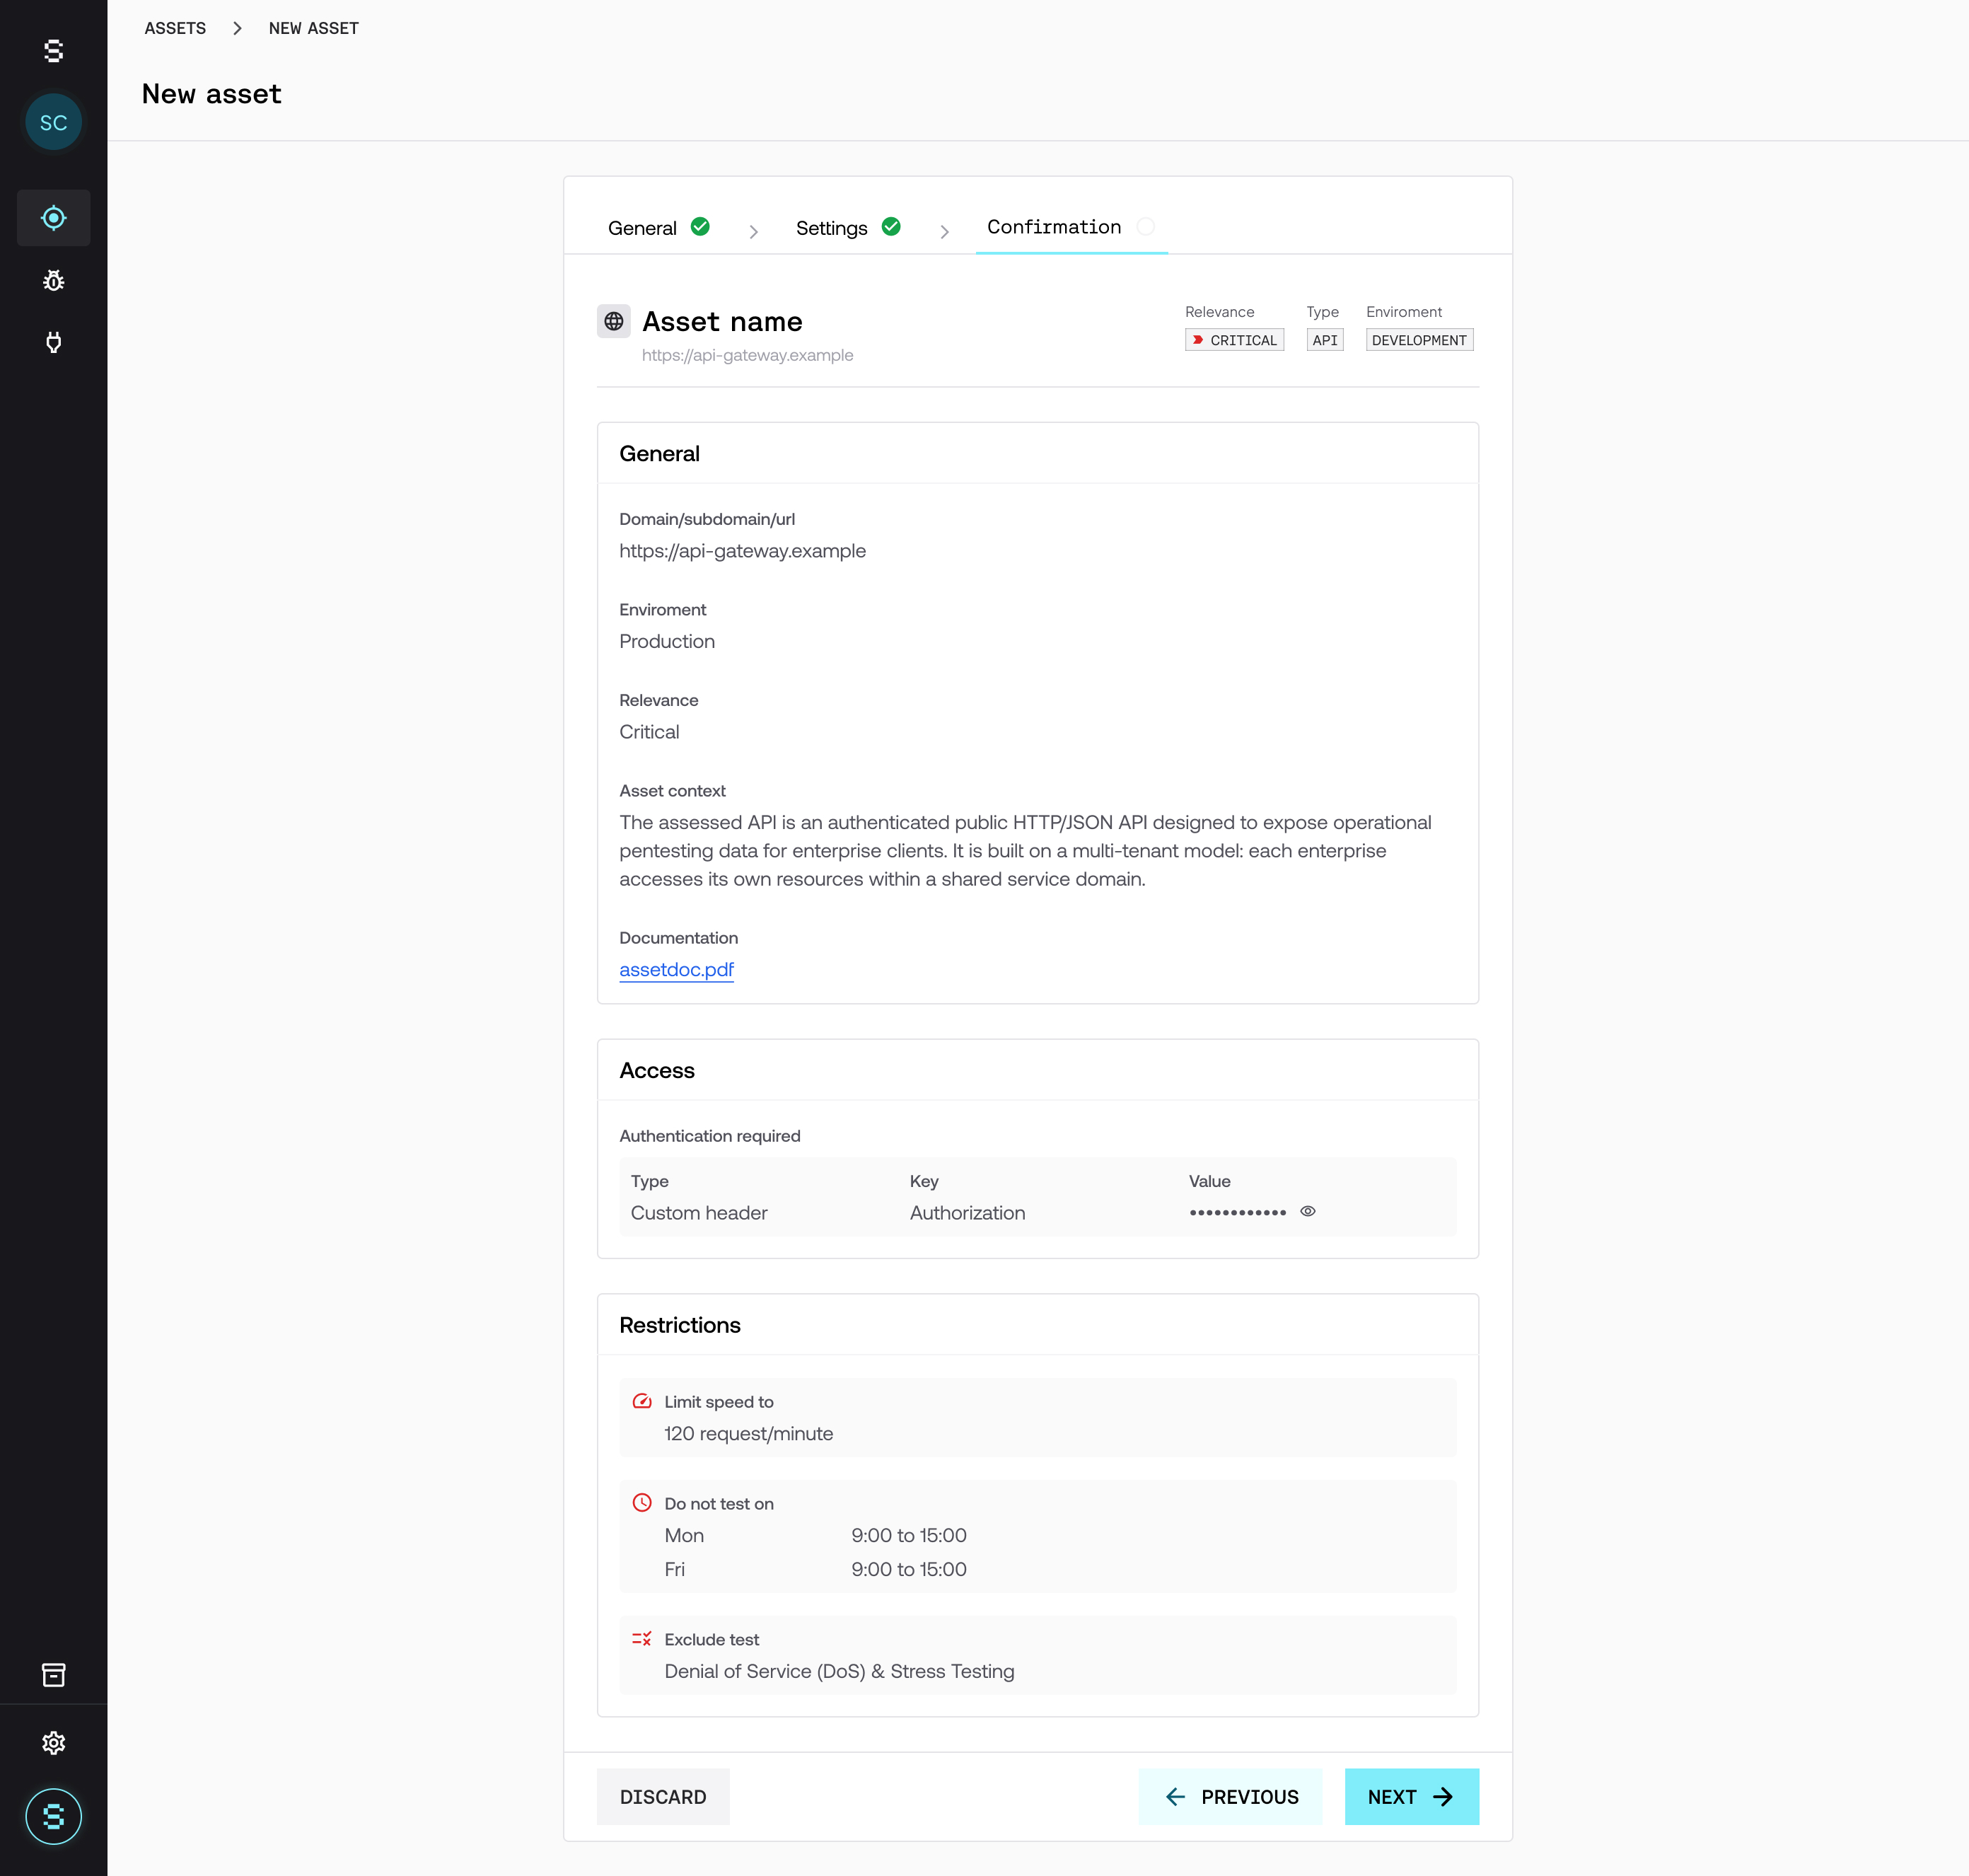
Once confirmed, the asset is created and ready to start running threat emulations.
After creating the asset
Once the asset is created, you need to activate it to start testing.
Activating the asset
To kick off threat emulations, the user needs to:
Click Start testing
Define the testing depth
Configure the recurrence
Confirm that Strike's IPs are whitelisted*
Once these steps are done, the asset runs its first execution.
💡 Important: before activating testing, make sure Strike's IPs are properly allowed in your security controls.
*You can find the list of IPs in the "Required access and permissions" section of the article Requirements for an effective emulation.
Things to keep in mind
The asset can be edited at any time
Changes take effect on the next testing cycle
Testing quality depends on the configuration you define
Checklist before starting testing
Before activating the asset, check:
Clear and relevant system context
Technical documentation attached (OpenAPI, PDFs, etc.)
Credentials configured and valid
Restrictions defined for the environment
Environment correctly identified (Development / Staging / Production)
Criticality level defined
👉 A well-configured asset significantly improves the quality of results.
Best practices
✔ Define the environment and criticality level correctly
✔ Add clear business context
✔ Include technical documentation
✔ Configure authentication whenever possible
✔ Regularly review new assets detected automatically by the platform
👉 Once the initial assets are loaded, the platform can continuously discover new assets through AI capabilities that analyze and expand the attack surface. Reviewing and managing them expands testing coverage and reduces blind spots.